Using The LCD Screen
In this section, we will build the circuit that connects the LCD screen to the Arduino, and learn how to program the screen to display different shapes, colours and text.
Building The Circuit
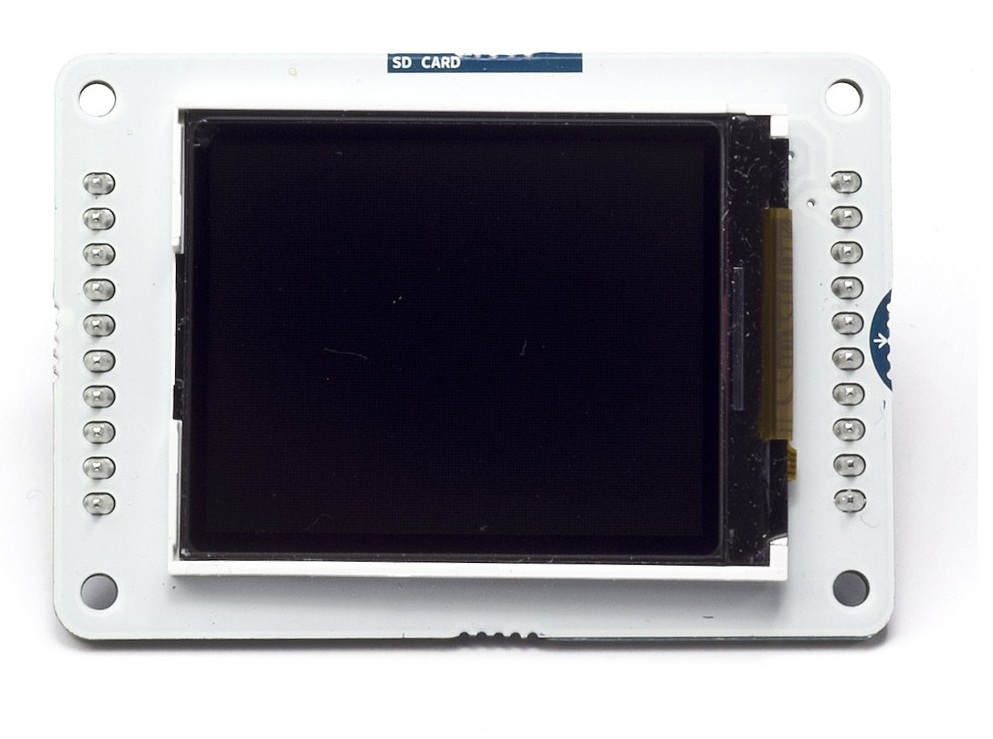
We will be using the Arduino LCD module as our screen. You can find more information on the screen here, and we will show you how to wire it up properly below.
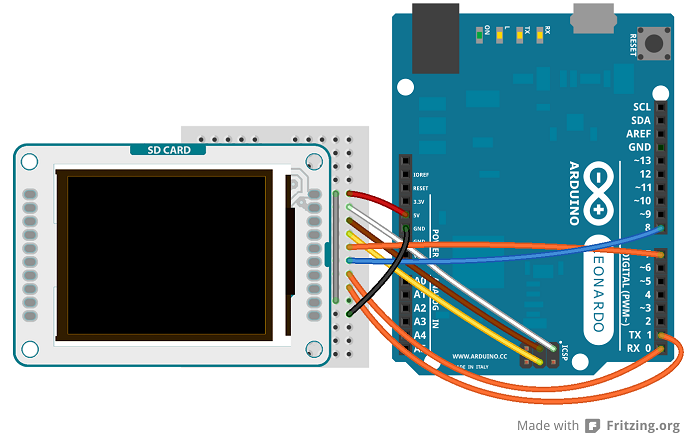
The wiring diagram for the screen is shown below. It assumes you are using an Arduino Leonardo board. The breadboards we are using are slightly bigger than the one shown, but that's okay. As long as you get the right wires in the right place!
Checking The Circuit
To check we have connected the screen properly, lets run a small "Hello World!" program. Open up your Arduino software, and use the code supplied below to check it works.

1
2
3
4
5
6
7
8
9
10
11
12
13
14
15
16
17
18
19
20
21
22
23
24
25
26
27
28
29
30
31
32
33
34
35
36
37
38
39
40
41
42
43
44
45
46
47
48
49
50
51
52
#include <TFT.h> // Arduino LCD library
#include <SPI.h>
// pins to control the screen
#define CS 7
#define DC 0
#define RST 1
// create an instance of the library
TFT screen = TFT(CS, DC, RST);
// Use this to count upwards forever.
int counter = 0;
// array of letters to print to the screen
char letters[10];
void setup() {
// Put this line at the beginning of every sketch that uses the GLCD:
screen.begin();
// clear the screen with a white background
screen.background(255,255,255);
// Set the fill colour to white.
screen.fill(255,255,255);
// set the font colour to black
screen.stroke(0, 0, 0);
// set the font size
screen.setTextSize(2);
// ste the font size very large for the loop
screen.setTextSize(2);
}
void loop() {
// Write hello world to the screen.
screen.text("Hello World!", 1, 20);
// The screen is dumb and always writes over itself.
// Blank the part of the screen that will change.
screen.rect(1,40,100,40);
// Print out the counter number.
String count = String(counter);
count.toCharArray(letters,10);
screen.text(letters, 1,40);
// wait for a moment then loop back round.
delay(500);
counter = counter + 1;
}

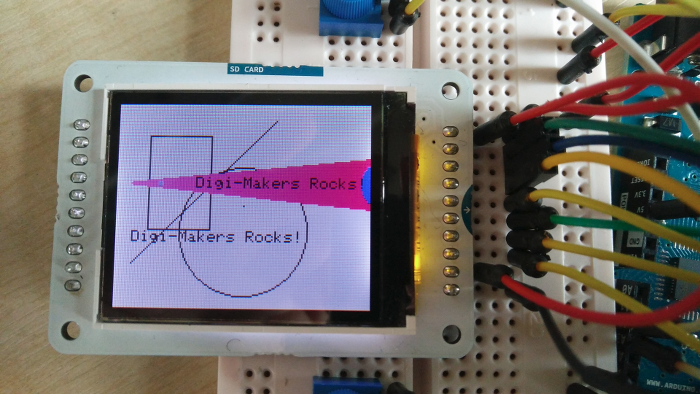
Hit Upload again, and hopefully, you will see the words "Hello World!" appear on your screen.
Programming The Screen
Now we will learn to program the screen and actually draw interesting stuff on it.
The code below goes through a bunch of different examples, and shows you the different things the screen you can do. Complex things can be drawn from lots of simple things, and you can build them into a full game. Try copying the code below and seing how it behaves when you run it. Once you think you know how each bit works, change things and see how it effects what gets displayed.
This is called Hacking!
1
2
3
4
5
6
7
8
9
10
11
12
13
14
15
16
17
18
19
20
21
22
23
24
25
26
27
28
29
30
31
32
33
34
35
36
37
38
39
40
41
42
43
44
45
46
47
48
49
50
51
52
53
54
55
56
57
58
59
60
61
62
63
// These two files contain everything the arduino needs to talk to the screen.
#include <SPI.h>
#include <TFT.h>
// create the screen object we can use to draw things with
TFT screen = TFT(7, 0, 1);
void setup() {
// initialize the screen
screen.begin();
// In this function we put everything that we only want to draw once.
// For example, make the background white:
screen.background(255,255,255);
screen.stroke(0,0,0);
// Add more stuff down here....
// Draw a single dot on the screen
screen.point(screen.width()/2, screen.height()/2);
// Draw a line on the screen. (X start, Y start, X Stop, Y Stop)
screen.line(10, 100, 100, 10);
// Draw a rectangle on the screen (X start, Y start, X Stop, Y Stop)
screen.rect(20, 20, 40, 60);
// Draw a circle on the screen (X, Y, size)
screen.circle(80, 80, 40);
// Text
// Set how big the text should be. 1 = 10 pixels, 2 = 20 pixels etc...
screen.setTextSize(1);
// Write some text at position (X, Y)
screen.text("Digi-Makers Rocks!", 10, 80);
delay(1000);
// Colours
// Set the background color. Do this first or you will cover everything up!
// screen.background(0,0,255);
// Set the colour of lines, and borders. Call this before line, point, circle or rect.
screen.stroke(255, 50, 100);
// And call this to remove the outlines and borders of the next shape you draw.
//screen.noStroke();
// This sets the fill colour of shapes. Call this before text, circle or rect.
screen.fill(100, 100, 200);
// Can you guess what this does?
//screen.noFill();
}
void loop() {
// In here is where we put everything we want to continuously update
// on the screen
// This code moves a circle across the screen. Can you figure out how?
int x = -10;
int y = 0;
for(y=0; y<screen.width()+20; y++)
{
screen.circle(x, 50, 10);
x += 1;
delay(20);
}
screen.stroke(0,0,0);
screen.text("Digi-Makers Rocks!", 50, 46);
screen.stroke(255, 50, 100);
// Can you make it change size as well? Can you make other shapes move?
}
Now you feel comfortable using the screen and the code to control it, lets move on to making our screen interactive. This will involve buttons, knobs, circuits and a little more code...